Your Cart is Empty
 Free Shipping
Enjoy the convenience of free shipping on all orders. We believe in transparent pricing and delivering value straight to your doorstep. read more...
 30-Day Money-Back Guarantee
Shop with confidence knowing you have a full 30 days to try our products. If you're not completely satisfied, return your purchase for a full refund, no questions asked. read more...
 2-Year Warranty
We stand by the quality of our products with an industry-leading 2-year warranty. Enjoy peace of mind knowing your vlogging and podcasting equipment is covered against defects and issues. read more...
 Lifetime Customer Support
Our commitment to you doesn't end at purchase. With lifetime customer support, you can reach out to our expert team anytime for help, advice, or troubleshooting, ensuring you always get the best performance from your gear. read more...
Over the last several years, the quality of videos and photos taken on smartphones—both Apple and Android devices—has improved astronomically. For aspiring filmmakers or video content creators, budget can be a major issue, and when nearly every person already owns a smartphone, it seems silly not to take advantage of this technology to create your projects. However, just because overall camera quality has improved, that doesn’t mean you can just start shooting video on your phone and expect it to be in perfect condition.
There are a lot of vital iPhone accessories, editing and hard work that needs to go into your smartphone filming in order to create a really impressive, polished piece of work. And one area where the smartphone still suffers is audio quality. Having crisp, clear sound on your video is essential to appearing professional and capturing your audience with the dialogue. Find out more about how to use your smartphone for film-making projects and enhance the audio quality along the way.
Although it’s tempting to film everything in the traditional portrait mode (meaning you are holding your camera vertically) because that’s how we hold, use and watch most things on our phone all day long. However, to create something professional and serious, you need to begin shooting in landscape mode (turn your phone to the side). Shooting in portrait mode will create a black box around the video itself, making it appear smaller. You want your viewers to be fully engaged in your video and be able to see everything that’s taking place easily. The black box that surrounds the video in portrait mode can also be very distracting. Instead, you want the image to fill the entire screen.
Every filmmaker absolutely needs a smartphone tripod or gimbal stabilizer to create quality films that will capture people’s attention. Think of the way that theBlair Witch Project was shot. This film was intentionally made to look as though amateur teenagers exploring the woods just happen to be filming a supernatural encounter. However, this style of shooting was purposeful—the filmmakers wanted the audience to believe that this was actual footage of a real event. But if you’re trying to create a professional film, you do not want to use this same style as, again, it is clearly the work of amateurs and it can be very disorienting to the viewer.
The only way to eliminate this natural shakiness is by using a device to purposely stabilize your camera. Thankfully, there are dozens of iPhone accessories designed to steady the camera and create seamless shots. These accessories hold your camera and allow space for an external microphone to be attached. A gimbal stabilizer is a handheld device that attaches to your smartphone and allows you to move around the scene without sacrificing the stability of the shot. Similarly, a tripod will hold the smartphone steady to capture a steady shot from one fixed point.
Lighting is important in both film and photography for a number of reasons. You need a certain degree of lighting to create a clear picture for your viewers so that they can see what’s taking place in any given scene. HBO’sGame of Thrones is, of course, touted as one of the most well-done and widely loved TV shows of all times, but the internet was flooded with hilarious memes throughout the show’s final season poking fun at the many battle scenes, which appeared so dark that viewers struggled to see who was still fighting and who had fallen in battle. Obviously, the show had already gained so much traction and attention that this was hardly a slip-up to discourage fans from finishing the season, but amateur filmmakers will not have nearly the same level of clout as HBO or theGoT producers–meaning your scenes need to be crystal clear.
Just because the viewer needs to be able to see what’s happening in the scene doesn’t mean you should shy away from creating dark shadows or overexposed scenes. As long as these tactics are purposefully used to create the desired effect that will hopefully evoke a particular emotion in the viewer, it’s okay to manipulate the lighting in a way that may compromise the overall visibility to some degree.
When it comes to smartphone videography and lighting, you may want to try taking advantage of natural lighting. The best times to shoot outdoors are the hours immediately after sunset or right before sunrise. These two times are referred to as the blue hour and golden hour. You can also use natural light when filming inside by bouncing light streaming through a window off a white card to create a soft light effect. The main time to avoid using natural light in film is in the middle of the day as it is too harsh and can overexpose the scene or create unusual shadows.
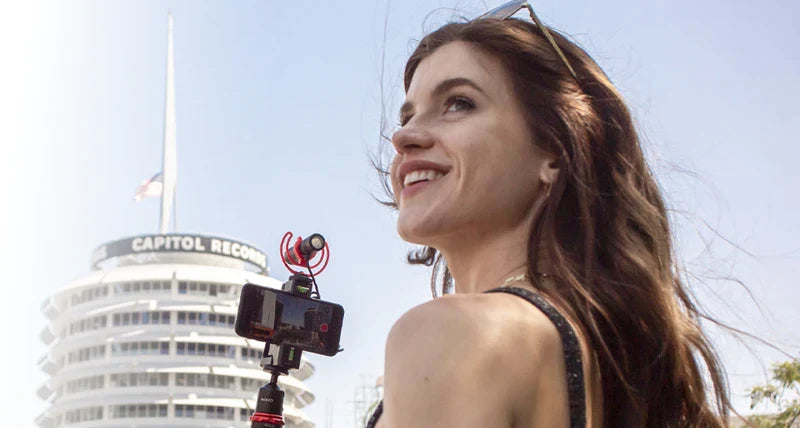
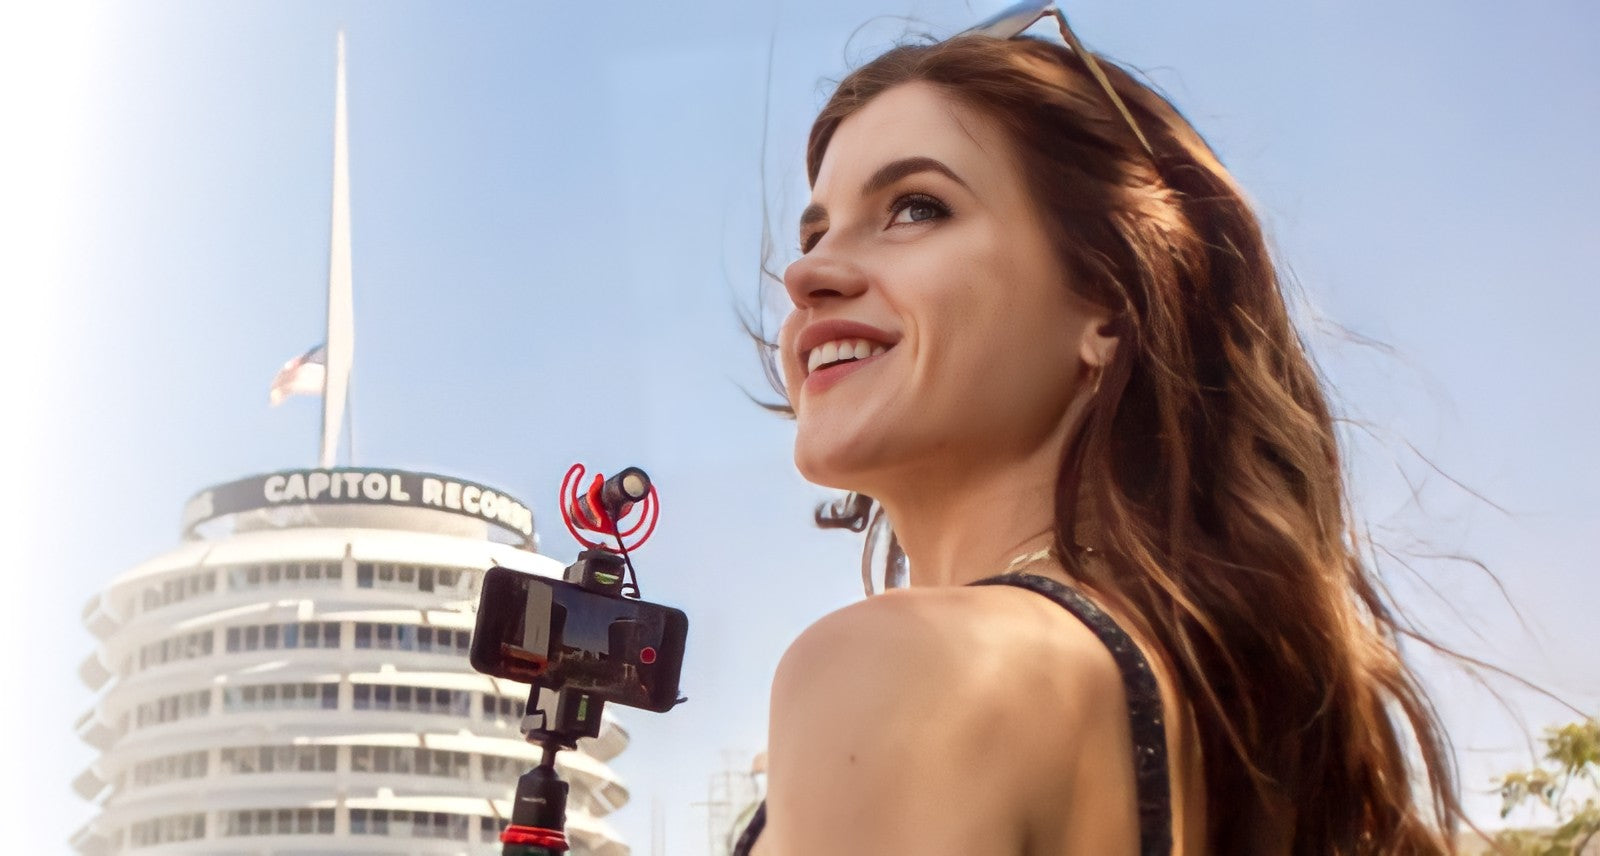
Audio quality is a huge concern when it comes to smartphone filming. Though the cameras have vastly improved using multiple lenses, autofocusing technology and portrait lighting, audio quality has not. Much of this has to do with the way that our phones are designed. We want our devices to be slim and compact so that we can easily carry them around with us throughout the day. Unfortunately, while camera technology has improved and shrunk, audio recording devices have not, meaning that recording parts take up more room. Our smartphones would become a whole lot bigger if every model had a high-quality mic, which is why smartphone microphone attachments are necessary when filming on these devices.
Depending on the type of project you’re working on, there is a whole range of microphones you can use. For anyone conducting interviewing in their films, clip-on lavalier smartphone microphone attachments are the best way to go. This will clearly capture the speaker’s words and hopefully eliminate much of the background noise. If you’re trying to film a scene with multiple actors or people involved, you can find a microphone attachment that can be added onto your stabilizer, picking up and recording the audio from the direction that you are filming in.
We’ve already spent a lot of time discussing how great the camera quality is on most new smartphones, but that doesn’t mean you shouldn’t look into other iPhone accessories like lens filters. With this type of technology, you could choose to film your scenes and then try to throw a filter over it afterward during the editing process, but attachable lenses offer a greater range of possibilities and allow you test out the appearance firsthand. These easy-to-use lenses can snap right on to the camera lens of your phone and create effects like wide angles, sepia tones, telephoto lenses for zoom and macro lens for close-up shots.
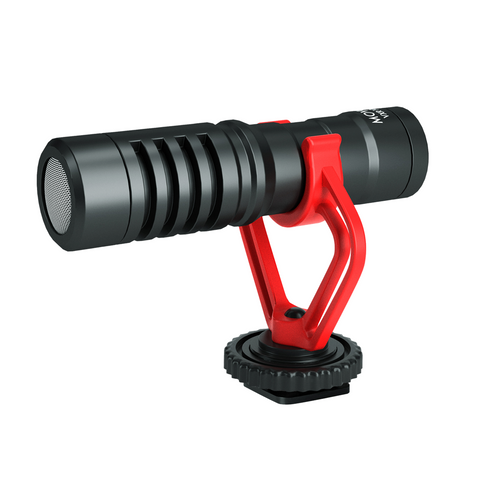
When shopping around for a smartphone microphone attachment, you’ll probably run into a lot of terms you may not be familiar with. Omnidirectional and unidirectional mics are both fairly common but have very different purposes. Unidirectional microphones are great for shooting video with your smartphone because they can focus on sound emanating from one specific direction. This will help reduce background noise and create a crisp, clear dialogue between the people on screen.
Omnidirectional microphones do just the opposite—they can pick up sound from multiple directions. This can be beneficial if you have multiple actors or speakers, such as on stage in a theater performance. But for filming, particularly with a small device like a smartphone, it often picks up distracting sounds in the environment, which can actually decrease the overall sound quality.
As you search for the perfect smartphone microphone attachment, keep an eye out for unidirectional microphones and consider whether or not you’ll need a wired or wireless version.
This iPhone accessory is great for filmmakers who also use a DSLR camera to record video as the attachment can be used on either a camera or a smartphone. The Movo VXR10 is compact and even compatible with other electronic devices like laptops, video recorders and more, making it great for people who are frequently working on multiple types of projects at one time.
The battery-free design means that you never need to remember to charge this accessory up—simply attach it to your device via an aux cable. With an integrated shock mount, this microphone is able to reduce background noise and improve overall audio quality.
You often see content creators filming with tiny mics in their hands - or attached to their clothes. This choice is not just for aesthetics, but also provides a high-quality, portable, and light-weight solution to on the go audio!
This product comes in different variations as well - Wireless-Mini for DSLR, Wireless-Mini-DI for Lightning, and Wireless-Mini-UC for USB-C type devices.
Before you get out there and start shooting on your smartphone, there are a few other things to keep in mind when it comes to recording audio. You should turn your phone on silent or airplane mode when filming to prevent any incoming notification sounds from disrupting the scene, forcing you to start all over. Keep in mind other noises that could interrupt your video as well. Eliminate as much background noise as you can and try to film in a place free from wind or background chatter–unless, of course, you’re looking to capture these sounds for a specific effect. In that case, you should test out how the background noise sounds before recording an entire scene.
When filming on your smartphone, your device is your camera, which means you need to treat it and prepare it properly. Filming for extensive periods of time can very quickly drain your battery, so be sure to start off with a fully charged phone. It’s always a good idea to bring a phone charger along with you as well in case of emergencies. If you happen to have a filming partner or a back-up phone, bring this along as well.
When it comes to capturing great audio, it’s all about controlling the microphone. Play around with your new smartphone microphone attachment before you begin to film anything important. This is the best way to learn how to place and direct your device to record the best possible sound quality.
Now that you’ve learned everything you need to know about investing in the right iPhone accessories, it’s time to try experimenting with your smartphone microphone attachment and create your next great project. Everything from short films to vlogs has been captured on nothing more than a smartphone, but when you have the right tools, it’s easy to create something stunning.


We’re a team of creators and entrepreneurs who proudly support the content creation community through innovative, high-quality products that let you do you. From filmmakers to photographers, vloggers to podcasters, and beyond, Movo helps you share your creative voices across countless mediums and content platforms everywhere.